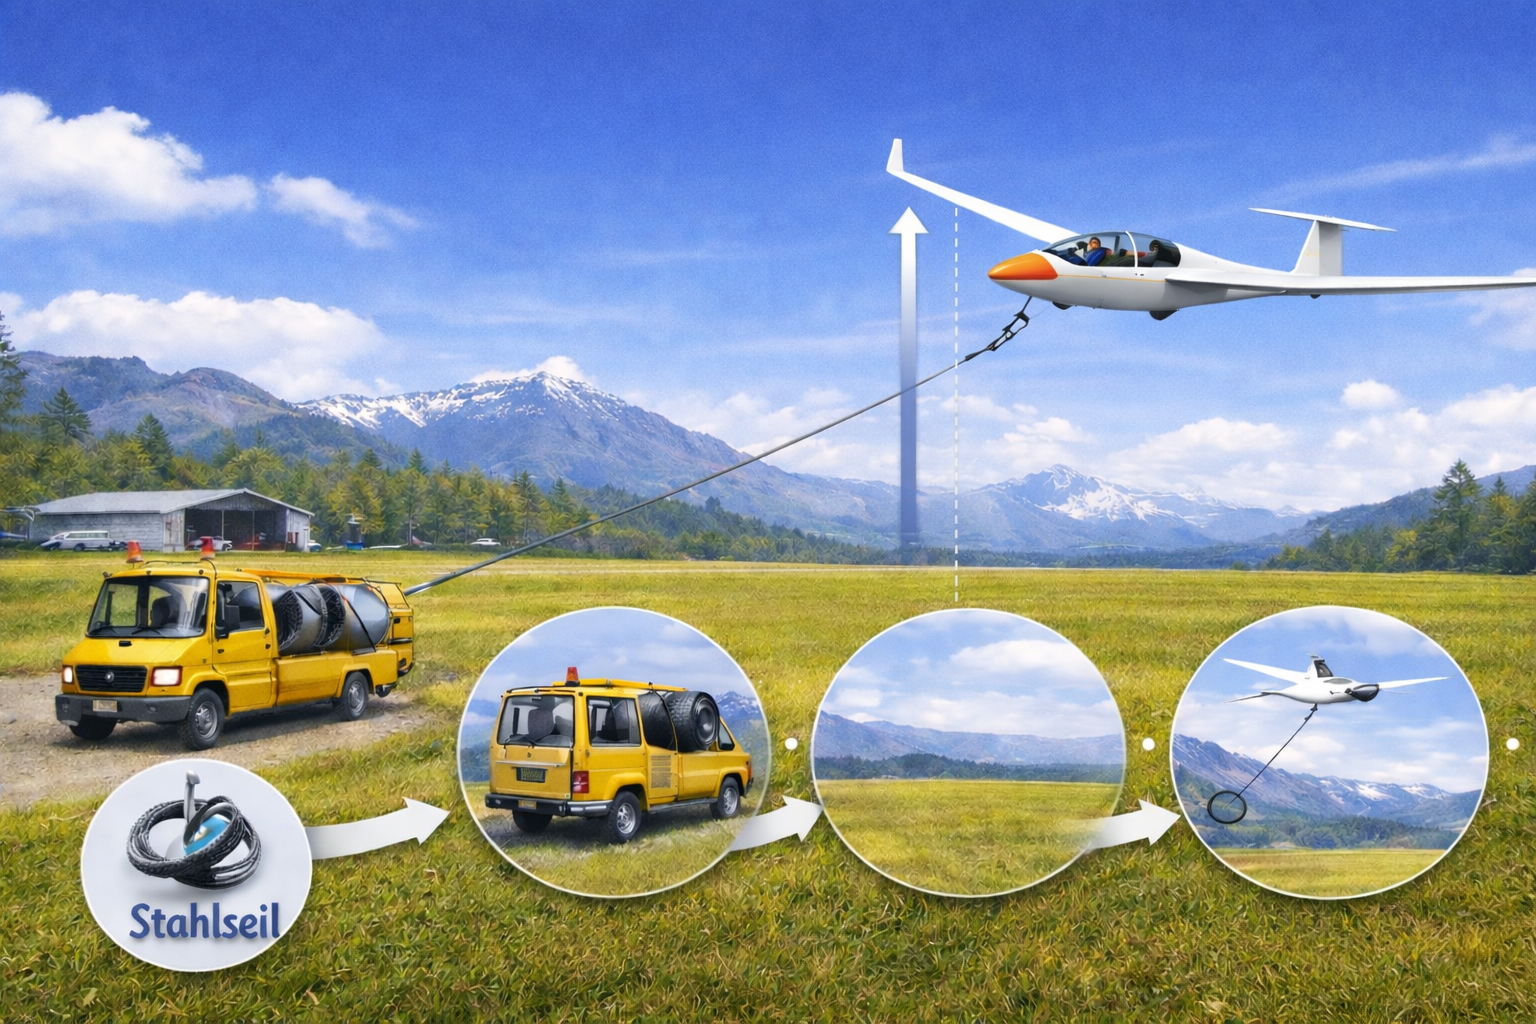
The winch start – a powerful start to gliding
The winch launch is one of the most common and efficient methods of getting a glider into the air. It combines technical precision, teamwork and the fascination of silent flying.
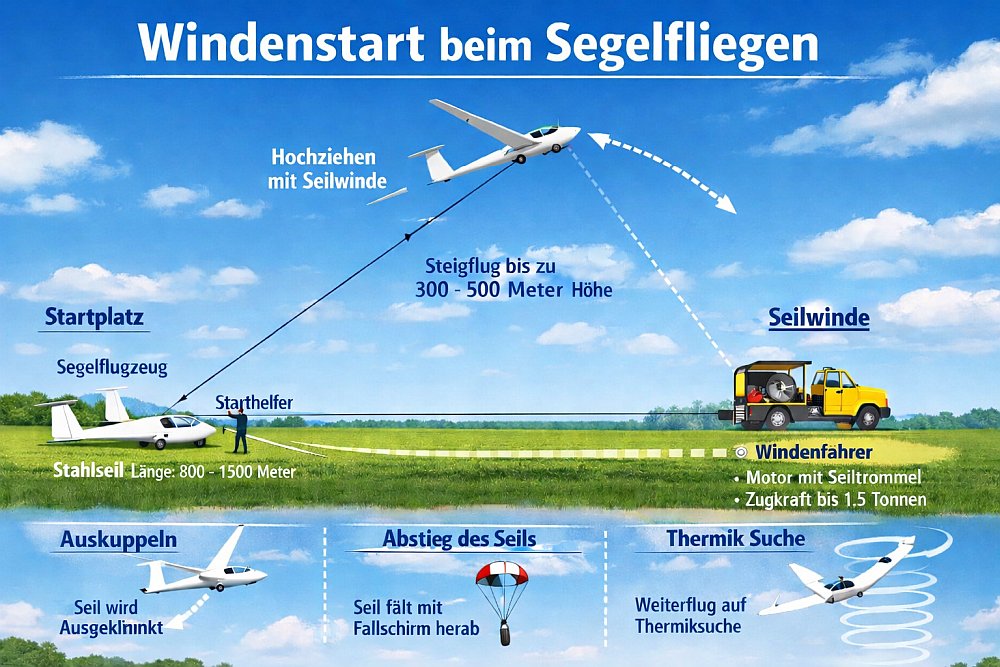
Procedure of winch start
During the winch take-off, the glider is connected via a steel or plastic cable several hundred meters long with a motor-driven winch that stands at the other end of the airfield. As soon as the pilot is ready and the release is made, the winch begins to retract the rope at high speed.
Due to the increasing traction force, the sailplane accelerates quickly and takes off after a short rolling phase. The pilot pulls into a steep climb, with the cable pulling force providing the necessary lift. Depending on the wind, cable length and winch performance, the aircraft usually reaches a height between 300 and 500 metersin ideal conditions also more.
Technology and safety
During the take-off, the pilot, launcher and winch driver communicate precisely with each other. Clear hand signals or radio messages are crucial to make the process safe. The pilot must maintain the correct speed, align the aircraft cleanly and be able to react to possible disruptions.
If there is a problem – such as a rope tear – there are established procedures: at low altitude, the immediate straight-ahead emergency stop, at higher altitude a return to the landing curve.
Winch launch stimulus
The winch start is not only inexpensive and environmentally friendly, but also gives an intense starting feeling: the sudden acceleration, the steep climb and the abrupt easing of the train when unlatching are characteristic moments that many gliders particularly appreciate.
After unlatching, the glider continues to slide freely and silently – ready to seek thermals or upwinds and begin the actual gliding.
Checklist – winch start for flight students
1. Before boarding
-
aeroplane externally checked ( rudder, tyre, bonnet, rope hook).
-
Parachute correctly created.
-
Weather, wind and track direction checked.
-
Launchers and flight instructors will talk through the process.
2. In the cockpit – preparation
-
Seating position and belts fixed.
-
hood closed, locked, checked.
-
Rudder clearance checked: Elevator rudders - rudders - transverse rudders.
-
Brake flaps: open – check performance – close – lock.
-
trimming set.
-
Radio and variometer checked (if necessary).
-
Checklist according to the scheme: C–B–S
-
Canopy (hood)
-
Belts (belt)
-
Stick & Controls (rowing check)
-
3. Before rolling
-
rope suspended, locked checked.
-
Pilot gives a hand signal or radio message: “Ready to wear!”
-
Test cable tension – slight tensile force noticeable.
-
Cross-check flight instructor/take-off conductor.
4. Take-off
-
Keep straight ahead, clean row work.
-
Observe speed (typically about 90–110 km/h, depending on the type).
-
Correct immediately in the event of lateral deviation.
5. Climb
-
Maintain a stable attitude (typically 30–45° angle of climb).
-
Keep speed in the green range.
-
Be prepared for rope breaking.
6. Notching
-
Upper end of the cable angle is reached.
-
Cable released by two short strokes on the release lever.
-
Control: Rope really gone?
-
Move to level flight.
-
Knock-off message: “Crope is out!”
7. After the start
-
Check the aerodrome situation.
-
Take course, seek thermals or follow instructions from the flight instructor.
-
Continue the flight cleanly.